Satisfactory Logistics

Pre-amble. When I was a kid, I wanted to be an architect. Or rather, of the career options presented to me, that was the one I was most interested and aligned to. I liked to take complex problems, re-use as many solutions as possible, and invent along the way to finding a solution. At the time, architecture was generally limited to buildings. They build larger plans, an engineer validated that the design respected all codes, and the GC organized the work. If all of them were great at their roles, crazy things came out as a result.

Unfortunately, I did not enjoy traditional architecture and it took me a while to figure how to make that dream a reality. The good news is that architecture has evolved since those days, and there’s a parallel function called Enterprise Architecture. Similar concepts, but different applications. Thankfully I’ve been able to lean heavily into this passion and make a great career from it. In that regard, my superpower is to take complex problems, and find practical and elegant solutions. Moreso, that those solutions can be re-used and scaled.

Factory Automation

On the surface, factory automation is just an ever growing mathematical problem. You want to create a certain amount of item Z. To get there, you need to create a certain number of items X and Y. And so on, and so forth, all the way back to item A. That is the end goal.

The initial conditions however are only about exposing you to item A, and over time you develop the ability to create ever more complex items. This increases the number of item A you need over time. The ability to do so is restricted by the base material available (if not infinite), the processing capacity (e.g. how fast and how much a machine can make), the power available (e.g. how many machines can you run at once), and finally the logistical capacity (e.g. move things from where they are to where they need to be, in time). This is both simple in concept, and complex in implementation. A lot like my favorite university algebra classes (sad horn noises perhaps on that one).

Logistics Planning

Satisfactory Logistics Overview

The image above is both generic in the types of steps, and specific to Satisfactory as the blue boxes within. Dimensional Depots only exist here after all.

  • Collectors are where you get base materials out in the world and perform the basic conversions. These are the simplest of items. In Satisfactory, this would be things like Iron, Copper, Steel, Caterium, Aluminum ingots. Liquids are here too, depending on transport needs. Unique to this game, Plastic and Rubber are also here.
  • Transport Logistics are how you get items from the Collectors to the next location. Early on, this is just more belts. Later on, when you need mass transport, trains are ideal. For low-volume items, Drones can be used.
  • An Input line is core to the next step, which acts as a sort of logistics hub. You bring things to it, they are sorted, and put into containers for future use. Getting them from the containers to the production line is done through belts/pipes.
  • The Production line is where you do all the crafting, and is designed to be modular and scalable. When an item is produced, it is sent to the Input location for future use. Satisfactory adds fun here, where you can have multiple crafting buildings, a storage buffer (here, or in the Input line), a Dimensional Depot (for personal use), and finally an optional sink for excess items. Personally, I don’t use sinks unless it’s unwanted byproduct, but it is an option.

The concepts here are applicable to every factory automation game, and frankly the differences between games depend on only a few details that generally add constraints (speed, size, complexity).

  • Factorio is 2D, so getting belts and hubs to work cleanly is borderline art.
  • Dyson Sphere Program has this exact model used for every construction, but has some nuance in the difference between base items (such as planets dedicated to Iron Plates), and buildings (a polar hub).
  • Foundry is a simpler version of Satisfactory, by a large degree. Transport Logistics are the main issue.
  • Techtonica (hitting 1.0 in early Nov) has more complex crafting cycles, speed issues with inserters, and significant space limitations. It will be interesting to see how this works with the elevator and a new location (new factory or complementary?)

The hardest part in all this is two-fold. First, the planning of the size required to make this run. I continually underestimate this. Second, the material to build floors/belts are absolutely massive. Getting started is hard, but once it’s running it is glorious to see. Techtonica is next up when it hits 1.0. This will be the plan!

Satisfactory – Power Improvements

I mentioned I wanted to boost output by 10x. Well, let’s just say that math puts that in a different context.

My original layout had 10 nuclear plants burning 100% of the time with uranium rods, and I was able to “sink” the waste through plutonium rods. Each plant runs at 2500W, but depending on the fuel may burn for more on a single rod. Uranium is 0.2 per minute, Plutonium is 0.1 per minute, and Ficsite is 1 per minute. The last one is essentially a sink for plutonium waste. An expensive sink mind you.

I was doing the maths on this and frankly, the material requirements were making my eyes bleed. Math is simple, you want 10x the power, well, you need 10x the Nuclear Plants. The ratio is 4:2:1 for Uranium:Plutonium:Ficsite in terms of rod burning. 100 plants = 60:30:15. The most basic element needed here is Uranium, and I would need 1200 per minute. The entire map has 2100 per minute available. So yeah, let’s scale back a bit to half that. 600/minute means a single node, and a 2 car train.

Uranium

Since I already had the production chain to get 10 uranium plants working, it should be a simple matter of tripling everything I have, right? Tripling production isn’t hard, you just add more buildings. I needed to shift some stuff around and truly make a bus-type structure, but it worked out. 5 Blenders turned into 15. The one “hard part” was getting enough Concrete. My prior choice to ship limestone was not going to work, so I built a dedicated Wet Concrete (Limestone+Water) plant to pump out 800/minute. A few other miners had to be boosted to 250%, and all my belts upgraded to at least Mk5.

Plutonium

Plutonium Rods are also a simple matter of triple production, and shifting a few buildings around. The challenge here is that the entire portion of the plant is radioactive, and moving things may mean holding onto radioactive material (and bugging out, requiring a relog). Still, it’s a relatively simple matter to grow the plant. I did need to add 15 Nuclear Plants, and use a Smart Splitter to ensure the rods were sunk until I was ready to turn the whole thing on.

By this point I had 45 Nuclear Plants, which was a huge investment in terms of complex materials (450 Supercomputers + 1125 Heavy Modular Frames). Again, Dimensional Depots to the rescue!

Ficsite

Right, this part is fairly insane in terms of requirements. Simply put, you cannot do Space Parts and Fiscite Rods at the same time. The material requirements are just too high. You need 15 Singularity Cells per minute, which is 1.5 Nuclear Pasta per minute + a ton of other things. It seems simple, but recall that up until Tier 9, your entire planet factory is likely only producing 1 pasta per minute. So fine, I needed to upgrade a few things to produce cells at 20/minute to account for transport time. And transport was… drones because I needed such a small amount.

Drones need fuel. The “simplest” fuel for drones are batteries, which I had yet to construct. This meant creating a battery plant on the east side of the map (near Bauxite, Copper and Coal), with plastic shipped in. That plant took nearly an entire session to complete, but looks impressive. Drones themselves are a bit finicky in structure – you build a dock and connect it to another one. So each “factory” needs a battery dock, and then needs a separate dock for each material transported. My battery plant had 1 dock that fed the map. My main factory + nuclear factory each had 2, one for batteries, one for cells. Problem solved!

Next up, SAM ore. 1400 raw ore, or 350 reanimated ore is not a simple matter as the nodes are spread out across the map. I thought about trains to ship stuff around, and plain out decided to go old school and belt my way to success. It’s a 4:1 ratio for ore, so a factory on each node to convert was simple enough and Mk5 belts are practically free at this point (Aluminum Ingot plan for the win!).

With the raw materials all sorted out, it’s a relatively simple matter to chain out the next steps.

  • Reanimated SAM + Aluminum Ingots = Fiscite Ingots = Ficsite Trigons
  • Singularity Cells + Plutonium Waste + Dark Matter = Fisconium
  • Photonic Matter + Electro Rods + Trigons + Ficsonium = Ficsonium Rods

Pump those into 7.5 Nuclear Plants and Bob’s your uncle!

Tons of work but well worth it!

Final result = 52.5 plants running at 2500MW – 131GW of power! Plus a massive power boost from the Alien Power Augmenters. I feel like He-Man.

Rocket Fuel

One thing I should have mentioned. Rocket Fuel (with alternate recipes) requires 1 Refiner (Heavy Oil Residue), 1 Blender (Diluted Fuel) and another Blender (Nitro Rocket Fuel). Base materials are Crude Oil, Water, Nitrogen Gas, Coal, and Sulfur. 6 of those setups (a Mk2 Pipe with 600 water) = 900 Rocket Fuel, over 216 Fuel Generators. Apply 250% boost (burns 2.5x faster) and you need 86.5 Generators, quite achievable. Grand total = 54GW. I expect this to be nerfed as it’s way too powerful. It’s also miles better and simpler to build than a battery plant.

Extremely simple layout, and a bottling plant on the left. Stupid efficient!

Lessons Learned

  • Dimensional Depots are the only way to make this work. I would have quit 10 times over knowing the trek to base was entirely due to piss-poor inventory sizing. I cannot understate how important it is to have this maxed, and setup (with triple boxes on Iron Plates + Concrete).
  • Use storage buffers in all your production lines, at every step. It takes next to no space, and allows you time to tinker without breaking the entire production chain.
  • Create a blueprint for Smelters, Constructors, Assemblers, Manufacturers, Refineries and Blenders that has all the inputs and outputs configured with splitters/mergers and Mk5 belts+ Mk2 pipes. Inputs go one direction, outputs another. For items with multiple inputs, you can stack splitters and use vertical belts to feed the machine. e.g. Manufacturers have 4 inputs. First is 1 high, second is 2 high and so on. Saves tons and tons of space.
  • Belts should be under the floor at all times for the power plant factory. You do not want to run belts on the same level as your machines. 2 small concrete pillars are ample height between floors.
  • I prefer to apply color to pipes (and floor holes) to let me know what’s in them. Water (blue), Nitrogen (grey), Sulfur (yellow), Excited Matter (white), Dark Matter (purple). Helps a LOT when under the floor.
  • Floor plans should have 4 sections. Material inputs (including trains + drones). Regular material construction. Radioactive material construction (hazmat suit + masks). And finally, the actual Nuclear Power Plants. Keep them separated, and allow space for growth.
  • Take breaks. Good golly take breaks.

Satisfactory – Final Space Parts

Spoilers here. If you haven’t sent the last shipment…

Lots and lots of material needed for this. My goal was to produce each component in 2 hours, so 120 minutes.

  • 1,000 Nuclear Pasta
  • 1,000 Biochemical Sculptor
  • 256 AI Servers
  • 200 Ballistic Warp Drive

Pasta

You need 10x more than Phase 4. The main issue here is going to be copper powder. Pure Copper on a pure node = enough for 2 particle accelerators that are boosted with Sommersloops, giving 4 per minute. This was the first thing I set up and just let it run. It took 4 hours. So I guess I failed this one?

Biochemical Sculptor

This one is actually super easy to make. I already had a ton of stored Reanimated SAM Ore, so making Ficsite Ingots / Trigons was simple. And I had a pile of Assembly Director Systems from phase 4. I had this done in an hour, with Sommersloop boosts.

AI Servers

Field Generators I had a pile from Phase 4. Neural Quantum Processors + Superposition Oscillators though… that was hard. I had 2 Quantum Encoders per material and those were boosted, with the AI Server also boosted. I could not get enough Dark Matter Crystals produced to keep up with demand. There are many ways to create these, but math says the most efficient method is through Time Crystals. I had to create a new factory just for these using some oil patches on the west side of the map, then shipped through trains.

I honestly thought this one would be simple, but it ended up taking 3 hours after I fixed the bottleneck.

Ballistic Warp Drive

Thermal Propulsion Rockets are from Phase 4, I had a storage container full. Again, Dark Matter Crystals were a problem here, so I prioritized AI Servers first. Singularity Cells are the penultimate item in the game, used for Ficsite power plants, Portals and Space Parts. Each building takes 1 pasta to create 10 cells, so you can for sure understand I had these boosted to keep my other things running while I did this. I had underestimated the concrete requirement (200/min). A pure node + wet concrete = 800/minute, which was the only solution that made sense.

I had to detour a bit to get the concrete bit sorted out with a dedicated plant, but once done, it took about an hour to get this part done.

Final Load

Putting all of this into the Space Elevator is the last step to the game proper. I won’t spoil more than needs be here, but it’s a damn cool effect and final scene before the credits roll and you get access to the gold coffee cup.

Factory Thoughts

Hindsight is a fun thing, and now that I can look back on the journey, I can see where I could have done better.

What went well:

  • Each Space Part phase was done in parallel, except Phase 5 – that was a smart move to avoid a pile of bottlenecks.
  • Running a mega-factory (about 50 units above ground) with a gigantic bus was also a very smart move, as it allowed me to scale production with relative ease.
  • Waiting for drones was also smart, they are painful to manage. Avoiding all vehicles except trains was brilliant!
  • And without hesitation, the smartest of all moves was building in production storage buffers. It created a ton of buffer for logistical nightmares. Future post on this.
  • Flight Mode + all alternative recipes from the get-go is a better experience. Hands down.

Where I could have done better:

  • I should have invested in Dimensional Depots earlier. Tier 5 for Jetpacks, and then spend an hour or so finding spheres. That one hour would have saved me 10 later on.
  • Planning train layouts, specifically building more flat/straight areas which could be used as future stations. It was a lot of re-work to add a station where the trains were on an angle – especially the eastern oil/plastic factory.
  • I learned about half-way through that it is more important to build dedicated production lines than small clusters. Sure, the ratio of refineries/blenders/power plants may be the same, but it’s infinitely easier to just add more refineries to a chain than add an entire block of buildings. I need more wire? Build more constructors and feed them to storage, don’t build more miners and smelters in a cluster.
  • Excepting the first portion of the game, “good enough” doesn’t fit my playstyle. Power issues only occur if you don’t plan. Shortcuts bit me in the butt more times than I’d like to count.
  • Mathematically, there is no need for any nuclear power. I set it as a goal, but it astoundingly better on your sanity to build a Rocket Fuel plant. It may not look as cool, but a single plan with 600 oil is nearly 150,000GW. I did the math too late.

Satisfactory – Tier 9

This was Goal 1, in that I wanted to unlock all options and see what they do. Quite an interesting collection of things.

New Buildings

  • The Converter is the big ticket item, and core to all of Tier 9. It creates all the new base products, including two new types of gasses. It is expensive to build in terms of material, and you’re going to need a few dozen. You can use it to covert material too, though I haven’t found use yet as the math is too complicated. (Note: Mk3 extractors @250% = 150 Nuclear Plants, not sure you’d need more.)
  • The Quantum Encoder is used primarily for Space Parts, but you’ll also need a few to get the new power structure running. They all have a by-product of Dark Matter gas, which you need to recycle somehow.
  • Portals are here. 1 hub building, and they can connect to satellites. Takes 2 singularity cells per minute to keep running (more on that). An interesting tactic is to keep the materials for a satellite portal and only use it when you need it.
  • Blueprint Mk3. Quite honestly, this thing costs too much to research and build. I tend to carry the mats for this with me, and build it next to a new factory location, allowing me to speed up construction. Look at this as QoL.
  • Mk6 belts. It’s the only way to make 250% overclocked Mk3 extractors function, but also works WONDERS for high production lines, like pure Bauxite/Sloppy Alumina, or dedicated Plastic/Rubber factories. They are great where stack sizes are massive and you want cleaner belts. The build costs are expensive due to Time Crystals.

New Material

  • Ficsite Ingots + Ficsite Trigons. Uses SAM ore with another metal. Relatively simple to construct at volume.
  • Diamonds + Time Crystals. Massive conversion loss where a pure node running at 250% may give you 30/minute. They stack to 200, so this may be a target for drones, or a dedicated train that collects only this item. You will need a lot.
  • Excited Photonic Matter. Converters make this out of thin air, used in Quantum Encoders. Meh. You never need to balance gas, so it’s effectively an energy tax. I guess it makes sense to go in ‘clean’ and leave ‘dirty’.
  • Dark Matter Residue. Byproduct of Quantum encoders and can be made from SAM ore. Used to make Dark Matter Crystals. You “burn” excess in making crystals.
  • Dark Matter Crystals. Holy cow you need a lot of these, space parts will bleed you dry. For sure the major bottleneck in Tier 9.
  • Superposition Oscillator + Neural Quantum Processors + Singularity Cell. Late game production items made in Quantum Encoders. Think of it like an upgraded Supercomputer. Your entire factory may end up producing at 50% rate for these items, but more like 10%.
  • Ficsonium + Fuel Rods. Allows you to recycle Plutonium Waste. If you’re actually running Plutonium, this is relatively simple to add to the chain.
  • Power Shards + Alien Power Matrix. Boosts power form 10% to 30%, at scale. I have 6 Alien Power Matrixes active (60% boost), and if I fed each 5/min, I would go up to 180% boost. In that sense, it’s like doubling my powerplant with a fraction of the complexity. Yes please.
  • Space Parts. Phase 4 gave you a taste with 100 Nuclear Pasta. Now you need 1000, and it’s the easiest of the parts to create. Getting this to work at scale is wildly complicated, mostly due to Dark Matter Crystal demands.
  • Alien Power Matrix. These boost Augmenters by a further 20%, but cost 5/min. You can create 2.5/min per building, so you have to boost it with a Somersloop to get the 5. It is absolutely not worth the work until after you are burning Ficsite Rods. Without hesitation, this is the most expensive part in the entire game, and as such, only meant for the extra late late late game.

After years of balancing, any new content is a huge breath of air. Overall, this is a nice new added layer of complexity, with similar throughput challenges we saw before. It isn’t terribly clear at the outset what throughput you actually need as you don’t really need any new nodes to mine, it quickly escalates. The great news is that the power requirements for early Tier 9 are not crazy, so you don’t feel like there are going to be cascade failures as you test things out.

Honestly, it’s quite impressive to see what’s here.

Satisfactory – Phase 5

This is actually an unfair title. The other posts in this series have been more about the journey through a phase up ’til the final Space Parts portion – this is more like the start of it. Phases 0-2 are simple and can be done in a night. Phase 3 will take a couple nights to coordinate as you really need to setup a large factory to scale. Phase 4, you will hit some weird math problems and logistical challenges getting enough raw materials to your factory. But, and this is really important, everything up until the end of Phase 4 can be done in a total of 3 locations – a fuel / plastic factory, an aluminum / quartz factory, and then finally a main factory. There’s zero need to do any more than that – Nuclear is completely optional, alternative power generation too. Two simple trains, or a loop, and that’s it. Win!

Phase 5 is different in that it looks at all your production lines and says ‘what if all of those hours, all that work, effectively allowed you to create 1 late game item per minute’. Hours and hours of work. Miles of belts. A near thousand production buildings. All of that, to create 1 item per minute. And then ask you to create 1000 of them.

To give you an idea, the first item in Tier 9 research requires 10,000 iron plates among other items. Having them is simple if you’ve been using industrial storage containers, but the number still made me go ‘wow’. Unlocking the new stuff comes with complex crafting cycles, where everything seems to be interdependent with something else, with buildings taking 4000MW each to run. It’s a bit like when we moved from the kid’s table to the adult one, it’s sort of the same but things are just fancier.

Time Crystals deserve a special mention. Each craft is 6/min in a Converter (12/min input, so half ratio). Diamonds are required, which is either coal (600:30) or oil (200:40). A ‘pure’ coal node at 250% = 1200/min. If 100% dedicated to Time Crystals, you’ll get 30 per minute. ‘Pure’ oil is 600/min, which gives 60 Time Crystals per minute. They stack to 200 and I use them like candy (it’s why Mk6 belts are so crazy expensive).

The strategy thusfar is the same as before.

  • Goal 1: Focus on unlocking every research item I can, and automate & store new items that are available. Once storage for all the new items is up, then it can keep going while I do other stuff. I have found numerous math problems that can only be solved with Mk6 belts.
  • Goal 2: Improve power generation by a factor of 10x. Nuclear brought me up to 100,000MW. That’s Uranium only, with me sinking 0.5 Plutonium Rods/min to avoid waste. Burning those rods would add 2x to my power output, and the waste can be further converted to Ficsonium rods, which burn for very little, but product no waste. So math says if I want 10x, I need to quintuple my current factory. That… that is going to be an adventure.
  • Goal 3: Produce enough Space Parts to complete the task in 2 hours of production. This seems simple, but again, I can build generally only build 1 per minute and I need around 2,500 items. Math is not my friend. I prefer to address power issues long before production issues… the other way is too painful.
  • Goal 4: Optimize. I’m at the point now where I have enough base construction material to rebuild almost any factory from the ground up, at scale. The east coast has 2 pure Oil nodes. I should be able to get 1,800 rubber and 1,800 plastic out of that, which should be more than I need for anything. My train network needs a 4 way-central hub, to cut travel times. I likely need to build a tier 2 factory in the north east. I have found no need for drones yet, maybe that will exist.
  • Goal 5: This is a weird one, fine. Tier 9. I have little interest in matter conversions. The idea is interesting, but the power & material costs make little sense to me right now, at least not at scale. 120/min is paint drying slow. Portals I’d like to test, but the costs to run seem somewhat high (2 pasta/min).

These are similar goals as I’ve had in prior phases, the difference mostly around the amount of time to achieve each one. Where the early phases may have a goal achieved in 10 minutes, at later phases it could take an entire play session. Heck, getting nuclear power setup took 2 sessions.

Satisfactory – Phase 4

Or perhaps it’s more like phaaaaaaaaaaaaaaaaaase 4. Where each prior phase is more or less determined by unlocking a new type of power source, Phase 4 is that and more. Biofuel is a simple 2 step process, Coal is 3 steps, and Oil starts simple enough, then turns into major fun time. Just look at this thing!

1 Pure Oil at 250% = 80 Fuel Generators

Phase 4 has you unlock Aluminum – a complex process that requires 4 different things and a by-product you need to build back into your lines. (Small note, pipes prioritize the lower flow; see here) Alternative recipes allow for a major increase in productivity, and as a result, trains become life bringers to a main factory.

Sloppy aluminum = way more silica than I originally thought!

I know it’s possible to “finish” the game without ever using nuclear power – there’s ample oil with each node giving ~20MW of power. A nuclear plant, on a single node of Uranium, should be able to give you 250MW, but sweet baby sally, the setup required to get it going is bonkers.

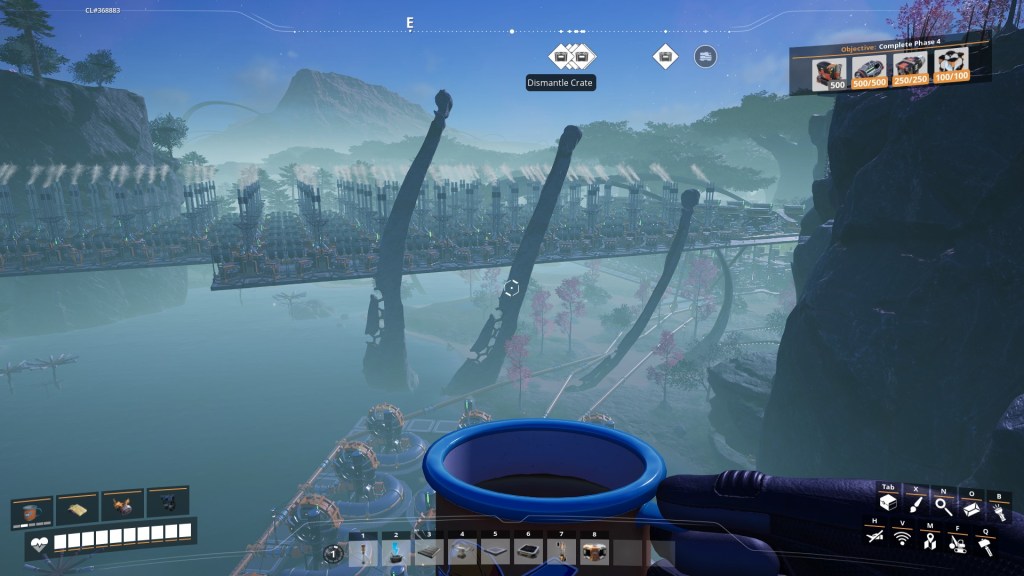
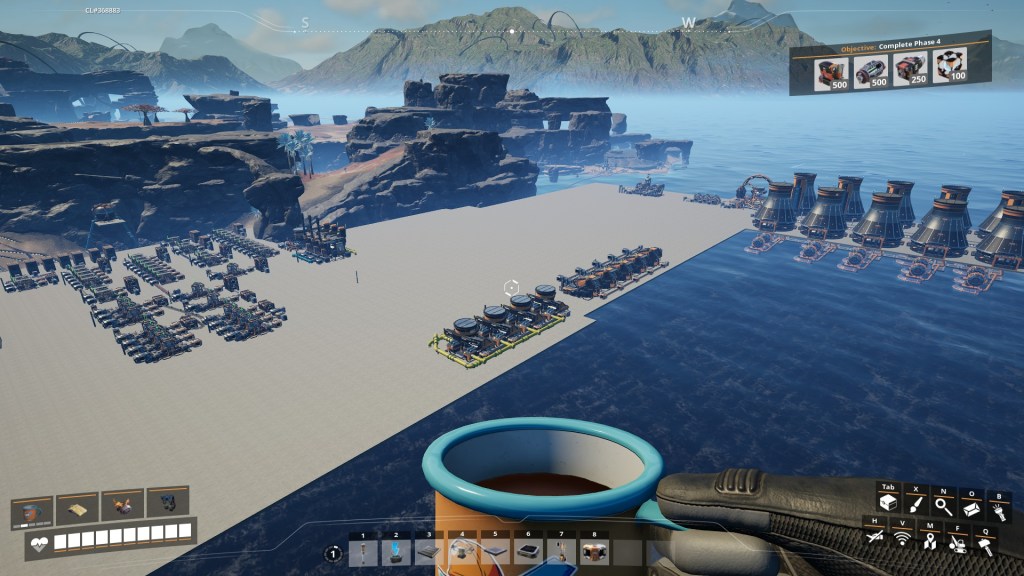
The boxes mid-left are storage containers for materials I need to ship in. There are actually 8 different materials shipped in. Things on the right are all radioactive, and I am “sinking” the nuclear waste. This setup was about 4 hours of effort.

I recall in all prior patches that the complexity of phase 4 builds meant multiple (dozens, honestly) trips to central storage for materials. Just look at the foundations used there, that’s honestly enough concrete+iron plates for 2 full runs to base. Dimensional Depots to the rescue! It has the same feel as playing in Creative Mode, but it’s so much more rewarding because I know I’ve set up the production chains to make it work.

Side note: Mk5 belts are easier to deploy and use than any other belt in the game. And not by a small margin. Mass-produce aluminum, feed sheets into 2 Dimensional Depots and you’ll never have a belt problem again.

Note that while I was waiting for Nuclear to fill the up the belts (it operates on a manifold) I went and collected every Somersloop on the map, and an extra 100 Mercer Spheres. The former gives me a 70% boost to power levels, and the latter means that my Dimensional Depots are fully maxed, and have every item needed for crafting available – there are more than you would think. The net effect is that a) the entire map is discovered, b) I’ve got all the boosts I can get, c) the ‘narrative’ seems to have reached a conclusion or I’m simply bugged, d) I’ve collected enough slugs to power Manhattan, and e) I have a newfound appreciation for map design. Sure, let’s stick with appreciation.

So now I’ve got all the pieces of Phase 4 unlocked, nearly 100MW of power to get things going, and time to unlock Phase 5. Most of that is simple enough, as it’s just mixing items I already have. Except for Nuclear Pasta. That is it’s own battle.

The great news in all this is that my main factory bus is still functional.

Ubisoft & Outlaws

It’s quite an indictment of the industry that a game which sells 1m copies is deemed a failure. Moreso that this is somehow seen as the end of Ubisoft. Perhaps the downward trend of the past 4 years is enough to shift them to go private or bought out, but they are far from going away. I tend to think of this a bit like Bethesda or Bungee, where ideas + corporate tend to lack alignment.

Gone are the days where only large game companies can deliver quality games. My backlog is massive, and entirely dwarfed by the glut of gaming possibilities. The odds of any game breaking into the scene and dominating share requires a near perfect storm of factors. The most important of which is that the game absolutely nails the core gameplay loop. Not just throwing stuff at the wall here, but hits it out of the park.

Wukong + Space Marines are perfect examples of this, where the games have an absolutely crystal clear focus on a single aspect, and don’t sprawl out into crazy town. I don’t need a game that offers a buffet of options – I have 12 to choose from already. Fallout 4 has more players today than Starfield, and they are both janky messes of games with too much going on.

If Outlaws failed at 1m in sales, then the failure is in the expectation. The game is not good enough to hit that target, plain and simple. Jedi Survivor didn’t even hit that target in the first month, and it’s a game with lightsabers! Outlaws did have an absolutely massive media push, which certainly cost a pretty penny, but from the first play sessions the vibe was not a positive one.

Buzz is based on balance of positive and negative feedback. You need more of the former to ride a wave forward, and there will always be a ton of the latter. If the first bit out of people’s mouths is “speeders feel bad” or “stealth has issues”, then you’re in for a bad time.

Reputation is also a big part of it. Ubisoft has struggled tremendously of late with their open world games, with just too much stuff and no focus. There’s a fatigue portion to just mini-map icons and the same skinner box with a different coat of paint. And Star Wars is probably at it’s lowest point in a very long time, with a cash cow that’s running on fumes. Andor may have had success, but it’s really the only Star Wars good news story in the past 5 years. The Acolyte set a new low (which is another topic).

I refuse to believe that the dev team thought the game was ready for launch. The “emergency” path to address the stealth problems means that this was in the QA file for a while. The “kitchen sink patch” for speeder control and enemy placements is another damning point for the game director. The game will launch on Steam on Nov 21, which is the last real kick at the can to make some of the investment back.

That AC: Shadows was delayed is hopefully a sign that somewhere, someone in a suit is paying attention. It will also raise expectations that the time is used effectively. Unfortunately, that is after the holiday season and lands right in the pile of the following games that have a similar genre:

  • Kingdom Come 2
  • Avowed
  • Monster Hunter Wilds

If anything, I hope that Ubisoft learns to be humble. The days of AAA dominance are well behind. Wallets are tighter than ever. Gamers have tons of choice, and will spend where there is perceived value. There’s a tremendous opportunity to find that sweet spot again.

Satisfactory – Alternates

Flexibility and complexity are a matter of perspective. Buying toothpaste is the best example. They all do the same thing, but have different boxes and sales pitches. I just buy whatever is on sale.

Satisfactory has a similar bit, and a whole subsystem of exploration that digs into it – alternate recipes. Strewn about the map are broken cargo containers. Each has a set of requirements (either power or specific material) which when provided gives a hard drive. You then use these hard drives to unlock alternate recipes. Each unlock takes 10 minutes to complete (you can “store” research mind you in 1.0) and provides an random recipe based on what tier of research you’re at. You can’t get Oil alternatives when in Tier 1, so you are generally incentivized to use them earlier than later.

There are 118 sites, and 113 uses for them (96%), which pretty much means you need to collect them all. Forgot to mention most of these are in difficult to reach places, where a jetpack is all but required. I will say that the first time I found them, I found it quite a fun exploration challenge. It took time, time that allows my production lines to complete their jobs. Then I needed to re-build my production lines with the new recipes (which is feasible when small). The 4th time I tried this though, I was frustrated. My 1.0 playthrough has opted to unlock all alternate recipes from the start. I build BIG factories, and resetting them for alternate options without mass construction tools is not fun.

Right, so that’s the method of unlocking recipes. The value of a recipe is the real kicker. Prior to 1.0 there were really only a handful of critical alternate recipes. Anything that removed screws from production chains was amazing. Solid Steel ingot is life. And the golden alternate remains Diluted Fuel – which alone doubles your power output. With over 100 uses, quite a few recipes were poorly balanced and to a point where you would only use them in emergencies.

For example – any alternate that uses Petroleum Coke is a bad recipe, because you should never have Petroleum Coke produced. That’s 7 “useless” recipes. There are plenty more. But there are some where you just need to get it done, or you have an excess of something and can afford to burn it.

Some recipes require a complete rethink of complex chains, which shows wonders in Aluminum production. The basic process (2:3 ratio) has weird mixes of Bauxite, Water, Coal and Quartz, and if not done correctly will stall production. Sloppy Alumina changes the math and layouts to sanity levels, and improves the ratio to 3:5. If for some reason you have excess Sulfur, you can add Electrode Scrap and even further increase the ratio to 21:40. No matter what alternate you use, it will require a complete rebuild of the factory chains.

My favorite alternate recipe examples are the “pure” items made in a Refinery. For things like Iron, there are ample nodes and this isn’t all that useful. For all the others, you are likely going to want to use them – Copper in particular. The basic recipe is a 1:1 ratio, and only uses Smelters. Simple, straightforward, and available at the start of the game. Pure Copper is a 2:5 ratio, which is a 250% boost. However, it requires a decent amount of water (simple enough) and twice as many Refineries as Smelters. That’s 15x the power requirements, so it’s not going to be even remotely viable as an option until you have nuclear power available. But it’s also the only viable path to Copper Dust, the core ingredient in late game Nuclear Pasta. You need 600 copper/minute to make enough Copper Dust to make 1 pasta/minute (for a total of 1262 copper/minute!)

Having flexibility in Satisfactory is a good thing. The node placement means that you’re not often going to have ideal circumstances for production chains, and your challenges will vary over time. As you unlock more things, and finally get a decent amount of Nuclear power going, the problems will just boil down to throughput.

With limits on mining (you cannot get more than 36,900 copper ore/minute), you will have ceilings to manage. Alternate recipes allow you to effectively fudge the math and increase copper output to 92,250/minute. Knowing which ones are worth it… well that’s a tougher sell. There are maybe a quarter that are amazing, half that are ok, and the last quarter that really should be used as a desperate last resort.

Satisfactory – Phase 3

Satisfactory currently has 6 phases. The tutorial (0), Biomass (1), Coal(2), Oil(3), Nuclear(4), and well the new stuff that I guess I’ll call Ficsite(5). The tutorial is exactly that, giving you the foundational parts that don’t require power. Phase 1 has you collecting plants and wood (with a chainsaw!) to have a basic powered production line. You need to grow over time, and unless you’ve played before, you will have spaghetti lines everywhere. Let’s just say that floors/foundations are the key to staying sane. Phase 2 is Coal, which should give you a huge chunk of power to make a decent sized factory work. You’ll learn about buses, load balancing, and manifolds at this stage. It is long, as the items needed to move forward require massive boosts to basic productivity at the start of a chain – a theme that continues. Oh, you get trucks at this phase to help transport items – you should not use them as belts will be infinitely better for some time.

Phase 3 is where the game jumps from backyard to the next town as you need to process oil into plastic, rubber and fuel. No matter where you start in Phase 0, oil patches will be a distance away, so you will need to use the build queue system to ensure you have enough material to build what you need in the new location. An additional hurdle here is that all oil production chains produce by-product, and you either need to use it for something or “sink it”. (The AWESOME Sink is a powered building that acts as a garbage disposal and rewards points used for cosmetic items.) Petroleum Coke should absolutely get sunk.

Phase 3 gives access to trains. Trains are life. Trains bring life. Trains. Ok, back on track (sorry!). You will need to build your first train line at this phase to bring plastic/rubber back to the factory, belts will not be enough and don’t scale. Building your first railway is a massive investment – it will look horrible and get the job done.

Fuel generators will dramatically (5x) increase your power output and allow for the next phase of factory construction. Without this major step, you cannot create enough machines to produce space elevator parts.

This specific phase is where Satisfactory starts to enter the scaling challenge. You will have 16 fuel generators, sitting on nearly 300 foundation pieces. Your train railway will require a thousand base material. You will need Manufacturers, that have 4 inputs, which take a few minutes each to configure. Blueprints help (a lot!) but they are really limited in size (4×4) and do not allow connections to other blueprints. Mods (which are currently broken) allow you to chain multiple buildings and configs to quickly construct massive production lines. Click and drag 8 smelters, 8 mergers, 8 splitters and have them all automatically lay down belts is insane quality of life. I miss that a lot.

I opted to build a main bus line to get me through this phase, which is both the best idea and worst idea. The best is that it is extremely scalable, easy to follow, and beautiful. The worst in that it causes absolutely massive sprawl with belts that seem to go on for infinity which will make your PC melt. It works, and is what allows me to maintain sanity when I have a fleet of 50 smelters working to feed a beast to make 1 space elevator part.

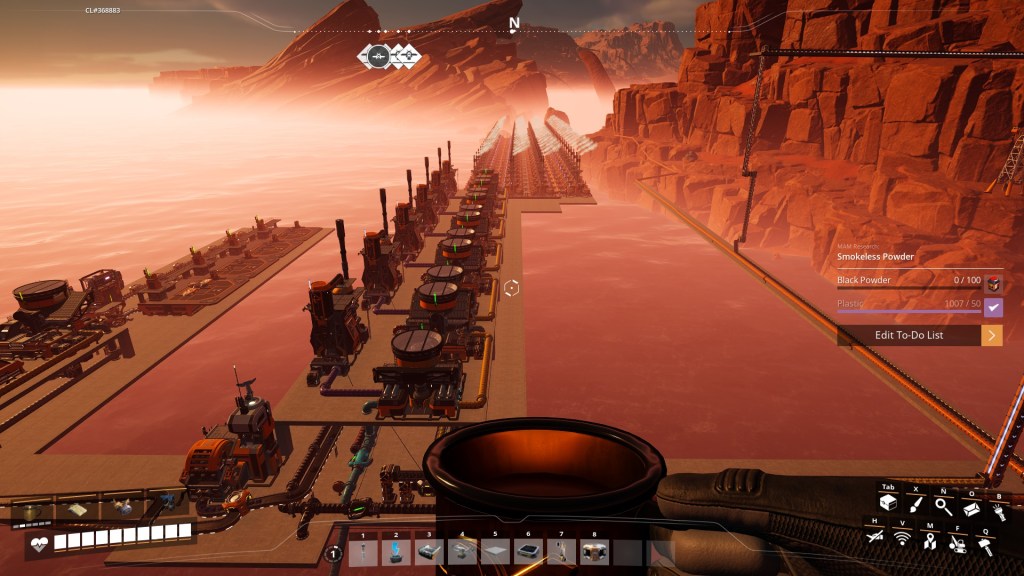
Train in the foreground, massive factory floor in the back. Stretches nearly to the end of the map. Below that platform is the army of smelters.

One item that has helped with sanity is the Dimensional Depot. I’m able to store 2 stacks of items on top of my regular inventory, and the visual aid shows when I’m about to run out. I’d love to automate adding items to the depot, but I need like 20 Mercer Spheres for that step. Oh, and I have Somersloops boosting a handful of production buildings – the space parts are always boosted when running. The setup is a right pain, but the truth of it is that I can simply let it run, and very easily scale it to my needs.

In short, Phase 3 is really where the proper game begins. You need to use more of the map, more material types, have major logistical hurdles, and truly need to manage scalable production chains. To paraphrase, you need to math the sh*t out of this. (Quick tip: press N, and you can use that as a calculator.)

Satisfactory – Dimensional Depots

I touched on this one, but didn’t get the chance to fully appreciate it at the time. Dimension Depots (DD) are a sort of virtual storage that is available to anyone on a map, from anywhere. I had some minor use for it early, but found it impractical. And then I actually thought about it.

DD are unlocked through the MAM research trees. They need Mercer Spheres and refined SAM Ore for each phase. It costs around 100 Mercer Spheres to unlock all the research, and 1 Sphere per constructed box. There are around 300 Spheres, so ample room here… if you explore enough to find them. Jetpacks + explosives are required, as these aren’t all lying on the ground.

The research tree has 2 arms. Upload speed (4 ranks, caps at 240/minute) and stack size (4 ranks, caps at 5 stacks). Stack size is irrelevant until mid-game if you can get your upload speed to be higher than your usage speed. When you take a few minutes to think about it, the only things you’re going to use in mass volume at a high rate are Iron Plates + Concrete. You may at some point lay down extra long belts, but it’s really the floor of a factory/train that takes all the material at speed. You can add multiple boxes on a single item chain (I have 4 DD attached to my concrete production), which means upload speeds are well beyond my ability to spend. For all other material used for construction, I have 1 box.

The implicit downside to this is that for slow producing items (e.g. super computers) you are cutting your production rate by putting it in virtual storage, which may impact downstream production. Low stack sizes reduce impacts to production lines, but conversely reduce your ability to build large factories as you wait for boxes to fill.

What’s the practical use though?

I built 2 lane railway around the entire map, with no interruptions based on my DD storage. “But Asmiroth”, you ask, “is that really a huge benefit?” And to that I say, the math to build a railway that size would have required all my inventory space be dedicated to crafting materials + 4 trips to refill. Trying to build a Nuclear plant at the north, missing 1 damn rotor, and losing 30 minutes going to and from drove me nuts. I also built an entire Diluted Fuel plant (5 Water Extractors, 10 Refineries, 8 Blenders, 40 Generators) without any inventory issues. Wild.

It is absolutely game changing, and removes the need for central storage systems that were core of mid/late game builds. And it’s such a major change, that it completely changes my perspective as to how other factory games are built. It’s right up there with survival games that let you craft from items in nearby containers.